Welcome!

Welcome!   Use a browser to view the website's pages at right

Friday, August 30, 2024

A Bridge and a Cut

The Track Dept. has undertaken a couple of projects recently, to shore up the Railway's continuing ability to haul coal at volume.


TRUSS BRIDGE UPGRADE


In late 1994, I had the mainline complete on the original SNR portion that was in the Millsbrae & Atlantic house,  except for one crucial piece -- the gap across the James River at Dominion.  At the time the only real choice for a long single-track bridge was the lacey Central Valley Pratt truss.  It was a craftsman kit, which was more than I really wanted to tackle right then, but -- since this was the final obstacle to operations, I dove headlong into it.  

Now you probably know the term "kit" in this case is an ironic wink/nod to a thick pile of dissociated plastic shapes, and a stick-figure diagram of miter angles.   I was able to get the deck in place fairly quickly, but the truss took me another eight elapsed months to finish.  (Naturally within minutes of its completion, Walthers introduced a beefy truss bridge of similar dimension that takes only an evening or two to assemble.  But I'm not bitter... ) 

Anyway I was pleased with the result, but it had two major drawbacks:

  1. It's a spindly iron design from the turn of the century (the last century), more suited to a granger branch than a coal-hauler's heavy mainline.  One system of diagonals is just a pair of pin-connected strap bars... And the opposing diagonals are even weenier, being just a pair of tie-rods.
  2. In the kit, the tie-rods are strung using plastic monofilament, which I over-tightened in a me-like fashion** to such an extent that they were actually deforming the truss into a bow.  So I cut them, allowing the truss to relax and spring back to its preferred trapezoid shape, which was much more pleasing to the eye***.  But now there were random disconnected tie-rods rattling around, if you cared to notice.

Friends claim they never noticed the weedy floating tie-rods, but then "they might be jivin' ya too".


My friend Tom Patterson wrote an article for MRH in 2011, in which he demonstrated how he'd shored up the same model for his Chesapeake Wheeling & Erie, also a coal-hauler.  I've always admired all the bridgework on the CWE while operating at his place, and in particular wanted to apply this same procedure to my CV truss.  Tom's version of course is the "gold standard", done to the 9's with heavy CV box-girder diagonals perfectly mitered into place, new custom gusset plates, a bunch of details improved, and beautiful weathering.  

Here's Tom's gorgeous example -- click here for the November 2011 issue of MRH. 


Having already spent 1% of my total lifespan on the original kit, however, I was loath to go to such an extent on an upgrade.  So I opted for the SNR "zinc standard", which is just sufficient effort to move the needle from "Silly" to "Good Enough For Operations".  

To replace the tie-rods, I used the lighter of the two CV girders -- the same ones the kit uses as verticals.  They don't provide quite the added beef as Tom's approach did, but importantly, they could be tucked through the latticework and into the box girders that form the top and bottom chords, without all that exacting surgery.  I re-used the strap bars, and passed them through the centers of these new diagonals.  


Tom went for maximum brawn too by converting the truss to a Warren design, with those big, heavy diagonals forming the zig-zaggy pattern of Charlie Brown's sweater.  I kept the original orientation on mine though, where all the compression members on one half of the bridge are parallel, and the halves oppose one another.****  It fits the lighter-duty diagonals better I think, like on a single-sheathed boxcar. 

🙏 Many thanks to good ol' Bill Doll, too (Forest Park Southern) for allowing me to raid the BILD-OLL Cranes, Inc. stash of Central Valley girders.


I finished it off with a coat of flat black (would you believe I'd never painted the thing), and a light rust wash with acrylics.  The result is way 80/20 -- not a contest winner, but looks substantially more stout than the original -- far less likely to collapse into the James under the weight of a giant Lima Berk.   


IMPROVED CLEARANCE AT WICKED RIVER


Hey speaking of Lima Berks, you may recall that the town of Segway is so named because it's where the Virginia Piedmont segués into the Blue Ridge.  It was intended as a division point, where the high-stepping 69"-drivered Berkshires (or, Kanawhas) are taken off of westbound freights, in favor of mule-legged Mallets which can take their sweet time grinding up the ruling grade.  

As it's played out, though, Segway doesn't really work as a division point.

  1. There's just not enough room to make Yaeger Yard big enough for such a function.  And,
  2. The engine terminal is tight even by SNR standards.  Shoehorning Mallets and Berks around the streetcar curves and onto the Heljan turntable, with scale inches to spare (usually), is a headache for the yardman, who is quite busy enough just keeping trains moving.
So a while back I thought I'd abandon this division point idea, and just let steam power run straight through, with the addition of a helper engine, of course.  Problem with that scenario was, there's one rock cut on a curve above Segway in which the Berks key up.  


#1812 is irritated to find itself jammed in the cut, just beyond the Wicked River viaduct.


Oddly, the much-longer Mallets, being articulateds, are slippery like worms and fit anywhere.  Whereas the "super-power" 2-8-4s, with their 4-wheel trailing trucks behind long rigid wheelbases, have a huge cab overhang -- devastating to a low-clearance road like the SNR.  


#1809 shows off her prodigious cab overhang at Claymoor.  Even on 28" radius, baby got back.


Just blast out the rock cut you say?  Unfortunately it's only about 1/2" thick, right up against the backdrop.  There just isn't much room for relief -- and the overburden clay sits flush right above it.  Didn't dare touch it, for the longest time.  But after running my own yard recently, I determined it was time to at least try -- and I had an idea.

Plaster dust clinging to the engines demonstrated that the main interference was coming from two wire handrails -- the grip on the back corner of the cab, and another one along the roof over the window.  Now I love my Proto Heritage 2-8-4s, but if Frank Ellison could remove entire valve gear sets from locomotives to improve operations, I certainly was willing to jettison a couple of detail parts you can barely see.  I figured it might also make negotiating those beasts through the service area a bit less dodgy, too.


Before & after the handrail removal -- ya kinda don't miss 'em.


So -- with the offending grabs removed from all the Berks, both sides, I ran a test train west out of Segway, and...  crunch.  SOB.  An improvement, but still.  Turns out the handrails were protecting the back corner of the cab roof, which now was the item presenting the evidentiary plaster dust.  So I just.....   naahh, couldn't possibly start trimming body parts.   

Time to tackle the dang rock cut after all.  I use cork tiles on edge for the strata, covered with a thin coat of plaster.  So with some delicate trial-and-error surgery with the needle-nose, thankfully I managed to free up enough clearance for the cab roof corners to pass in both directions, without creating a horizontal gash, or, striking wood.  (There now, was that so hard?)


Touch-up coats of plaster and ink washes pretty well hide the accommodation.  OK, well enough.


Now... here's why this story was worth telling.  Not saying we're never changing steam at Yaeger Yard again -- but we now do have options.  All kinds of options, really -- across the whole schedule.  Prototype steam did have regular assignments, but there were always exceptions.  Some variety will be great for freshening up the ops.
👉  Yard guys -- love to hear your feedback:  what's your level of irritation with the steam power change at Segway?  Can't wait to have done with it?  Or no bigs?


👂  And for everyone, thanks for reading -- and let me know what you think!   


FOOTNOTES


** I have a lifelong fear of being that wormy guy who doesn't tighten bolts adequately.  So I have a tendency to overcompensate -- to keep cinching things down until I either strip the threads, or bend the work.  A car friend once made me a set of diagonal struts for the nose of my 1962 Cadillac that would help quell the convertible "cowl flex", as he'd done with his own '62.  However, when I installed them, I cranked them down so tight I actually deformed the 3-piece front bumper into a crescent.  Brilliant.  


*** What's really interesting about this bridge is that, even with actual steel reinforcement inside the deck stringers, the truss actually does provide useful support, rather than just looking pretty.  With the truss superstructure removed, a locomotive will materially flex and sag the deck, a solid 1/8" or more at mid-span.  Whereas with it clipped in place under the cross-bearers, even with the old tie-rods cut, the entire span stays rigid.  This is not only cool, it is a big help in encouraging trains to stay on the rails.  More than "Life imitates art", I'd say this is something like "Life continues to happen, even in art".


**** OK, nerd time!  By replacing the weakest diagonals -- the tie-rods -- with girders, and keeping the lighter strap bars in the same orientation, technically what I created was a Howe truss.  In a Howe design, the heavier diagonals lean toward the centerline, and are in compression, with the verticals in tension.  Whereas with the Pratt, the opposite is true:  the heavier diagonals fall away from the centerline and are in tension, with the vertical members being the ones in compression..  

This explains the lacey look of the stock CV Pratt truss:  the thing is being held aloft entirely by the tension through pin-connected iron strap bars.  It also explains why one ought not run 400-ton Berkshires across it!  I didn't become a civil engineer because for starters I couldn't stomach the second semester of calculus (also see note on over-tightening, above**), but it still is fascinating as heck.  

If you're down for some additional nerd-gratification, try these:
  1. Bridge Types -- a great one-page overview of the various designs, if you've ever wondered, done by the Iowa D.O.T. of all people. 
  2. Practical Engineering -- one of my favorite YouTube guys, Grady Hillhouse, distilling civil engineering concepts into short digestible bites for the pedestrian.  With dry humor added.


Wednesday, July 31, 2024

Minutiae


The SNR is pleased to announce the completion of a couple of infrastructural trifles I've been intending to get to for like, years.  These are nearly meaningless as well as unphotogenic, but come celebrate with me anyway! 


1.  East Segway Interlocking -- Occupancy Detector

If you've ever crewed a helper engine, changed road power, or operated the yard at Segway before, you'll recall how impossible it is to tell when your consist has cleared the interlocking at EY tower.  This is because the eastern extremity of East Segway is located:

  • behind the diesel house, 
  • around a bend, 
  • through the trees, and 
  • inside a concrete block wall.


You're never quite sure if you're going to throw a switch under your locomotive, 
without hiking to the other side of the wall for a visual.   


But no more!  With the addition of one optical detector from Azatrax, the crewman can now tell from the panel when the interlocking is clear and the switch to the main may be thrown.


Installing the detectors from underneath the diesel house, through the benchwork, and behind one of the only non-removable hillsides on the property, was a bit like building a ship in a bottle.  Each stem had hot glue liberally applied to it, and then was placed by feel and held until set.  

This was an iterative approach however, as the first attempts ended with my fingers glued together, or, with the sensors glued to my fingers but not to the layout.  Eventually a proper placement was achieved though, successfully illuminating the new panel indicators when the primary switch is fouled -- and successfully clearing when not.  


I was so pleased I added a repeater on the main yard panel while I was at it. 


2.  Della St. Crossing Flashers -- Re-Configured West Detector 

I put out a call a few weeks ago for an Atlas telephone shanty, should anyone happen to have had one in his junk box.  Bill Doll (Forest Park Southern) stepped up with a unit from a prior layout (thanks Bill!).  If you were on that email, you might be wondering what it was about.  Well here's what I did with the shanty and why.


As above, it has to do with optical detection.   I love Azatrax flasher circuitry and detectors, and have installed them at three separate grade crossings.  

Azatrax allows you to configure the infrared LED emitter/collector pairs in either across-the-track mode, or between-the-rails mode.  In the former, breaking the beam trips the detector.  In the latter, connecting the beam -- by having it reflect off a car chassis -- is what trips the detector.


Initially I liked how clean the between-the-rails mode kept the surroundings, and so wired all the visible detectors this way.  It was not long, however, before I began pulling these back out, and re-configuring them for across-the-track mode.  The primary reasoning was twofold:  across-the-track 1) is significantly more reliable and less finnicky, and 2) accommodates multiple parallel tracks with one detector.


I reconfigured every last pair except one -- the west remote detector on the mainline in St. Amour.  This was primarily because I couldn't find a good disguise for the collector, which would just be hanging out there in space between the main and the yard, with no room (or reason) for a building, outbuilding, or pile of shrubbery.  

This meant that for years, Della St. motorists have been unprotected from trains moving eastbound on the secondary track.  And even on the main, sometimes the engines are halfway to the crossing before the detector gets a good reflection off a car chassis and trips.

Well I finally got a fit of inspiration -- the one thing that would both work and fit (and be plausible) would be a skinny telephone shanty like the Atlas.  So I went looking for one -- and here we are.  


In the new across-the-track placement, the collector just keeps an eye out through the window in the shanty, 
and the emitter is hiding in the woods.


A train approaching Della St. now trips the detector even while on the secondary.


In the Company's two-tone green paint, and at an SNR level of compression, 
the telephone shack might even pass for a yard office.  


3. Rodentia

As if destroying my smoke at the Basin refinery wasn't bad enough, the mice have now, for no apparent reason, chewed through my delicately-strung barbed wire.


"Enough is ENOUGH!

I have HAD it

with these MOTHERf____in' MICE

on this MOTHERf____in' LAYOUT!"


-- Samuel L. Jackson, Snakes on a Plane


Bet you didn't know Sam was a model railroader.  😉   (To see the actual clip, click here. [PARENTAL WARNING].)

The irony is, it's the snakes that are missing from the equation in this case.  The black rat snakes which ordinarily patrol the woods around the house so diligently seem to be on sabbatical, so the varmints are free to set up shop in the basement.


The little vermin can't resist raiding the scrap wood piles at Slim's Cooperage -- 
which used to look a lot more like lumber cutoffs and less like mulch.  But no real loss there -- 
and it makes Three Rocks the ideal location for countermeasures, which have been effective.


Just wish they hadn't sampled the barbed wire across the tracks.  That was all strung in continuous threads and super-glued, so repair is going to be a project!  Why.  Alas.


👉 Well thanks as always for reading, and let me know what you think!


Saturday, June 8, 2024

Misty


"Look at me...♫   I'm as helpless as a kitten in a tree...♫"
-- Erroll Garner Trio, "Misty", 1954


If you've operated at my place recently, you've probably already seen the complete-ish scenery at Misty, W. Va.. (Or if you prefer Led Zeppelin to Erroll Garner, "Misty Mountain".)  

In a me-like fashion, it's been 90% done for months -- have just been waiting on some last-minute details before posting about it.


One of the things that took so long was that I have been recording the process to use as a "How It's Made" page on the permanent blog.  I've been wanting to document (because someone might be interested!) the scenery contour methods on the Suffolk Northern.   They are a bit unorthodox, not unlike most of the rest of the layout, nor the owner himself.  But hey, re-inventing the wheel and tuning it for my own needs and preferences are actually part of the fun.  

I'd appreciate it if you'd take a look at that page and tell me what you think:  Suffolk Northern Ry.: Landforms.  All feedback is welcome -- on the methods, the effect, the page itself, the author's musical taste, whatever you like.    


"On my own...♫  Would I wander through this wonderland alone...♫"


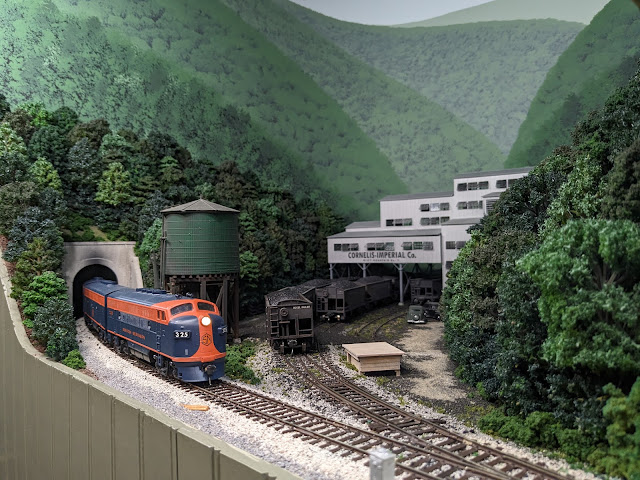
Misty is the helper cutoff point at the summit of the westward ruling grade, and the location of the Cornelis-Imperial Co.'s #3 tipple.  Finishing the scenery here was a boost to railfanning, so the trains emerging from the summit tunnel, instead of just drifting through masonite and homasote, finally have some mountains to conquer.  Or as the Tweeners say, "mouw-ihs".     


"So I'm packing my bags for the Misty mountains, where the spirits go..."
-- Led Zeppelin, "Misty Mountain Hop", 1971


Thanks as always for reading, and please if you have a minute, take a spin through the page at Suffolk Northern Ry.: Landforms and let me know what you think.  


Friday, April 26, 2024

Something Different for Alleghany Scrap


You've probably seen or heard me talk about Alleghany Scrap in St. Amour, and how there are retired locomotives towed in and set out for it by road trains.  Seldom modeled, but a regular occurrence in the Transition Era. **

In the back of my mind I'd also planned on sending freight cars to their demise as part of the process.  I sprang the first one on unsuspecting operators last week, and was surprised to receive compliments, rather than abuse for it being silly as I'd expected.  So I thought I'd share it here.


I wanted a car badly-enough compromised that it needed to be scrapped, but not to a cartoon-violence degree where it would need to be cut up on the spot.  It seemed the best way to approximate this would be with a metal car, rather than melting a plastic car into a glob.  So a while back I picked up a couple derelict remnants from the good ol' days on Ebay for cheap-ish, to eventually use for such a purpose.


All-steel cars actually have a fair amount of structure in the box, ends, and frame.  They crumple by degrees, rather than just being crushed like a beer can.  So I braced the car in the carpenter's vise a few panels back from each end, with some cradles cut from scrap wood to preserve the essential "house" structure - and began delicately beating the crap out of it, trying to mimic the damage one might expect in an accordion-style derailment.  


As I did so, the 60-year-old paint flaked merrily off at the deflection points, leaving acres of gleaming metal, sparkling in its deformity.  So I applied rust in those areas - and other areas where the structure had given way, such as the roof popping off the sides at the far end.  It's probably a little extreme, but I figure it must have rained at least once between the derailment and the salvage op, so a little orange and yellow rust on the newly exposed areas could be expected.  Beats repainting it!  

The flat car was a gift from my friend Bill Doll (Forest Park Southern), dressed up nicely with sprung metal trucks and a beautiful wood deck.  I kind of hated to cover most of that deck, but the car was handy, and not in service yet - so it's now the official conveyance of wrecks.  Not to imply any issues with the FPS's freight-handling ability or anything... 


The destroyed boxcar awaits its turn with the torches at Alleghany Scrap in St. Amour. 


During ops, I generally like to have the scrap item set out at St. Amour by a westbound overhead freight.  That gives the road crewman something to do, and, it allows the white-lined equipment to make almost a full lap of the layout before being dropped off.  Even with an old cast-boilered steam engine, I'm happy to add a helper to shove its fat ass up the westbound grade, rather than just have an eastbound drop it off immediately after departing staging.  

But, that scheme requires said equipment to actually make it around the layout.  


Disaster looms in Claymoor, W. Va., as the scrap load approaches the Cassandra Rd. bridge.


See, the SNR, in addition to its boxcar slogan "The James River Route", is known variously as 

  • "The Shoehorn Route" and 
  • "The Path of Least Clearance".    
Or, as my friend Darren Williamson (IHB) puts it, 
  • "NO ROOM FOR CAR ON SIDE OF CAR."  

While not technically even exceeding Plate B, the damaged car with those jaunty crumples snagged everything on the first test run - trees, tunnel portals, fences, buildings, standpipes, bridges...  Even turning it around only solved a couple of problems - and created more.  God help me I should ever run a high-wide movement.  


That crumpled roofwalk shoved the highway bridge fully clear of its footings
and collapsed it into the cut, 
causing the further destruction of a beautiful aquamarine 1950 Buick Super,
and the profound irritation of its occupants. 


So in service, the car will have to be dropped off by an eastbound freight only - running about 20' out of Gallipolis staging - and with the big crease facing west only, so the St. Amour crewman can actually fit it into the cut tracks at Alleghany.  Period.  Ah well - it's been fun.  Guess that's why it needed its own post, so somebody could see it!


Thanks as always for reading, and let me know what you think.  Interesting, or silly?  (No need to comment on restricting Plate B movements however, thank you very much!)  


FOOTNOTES


** More info/photos re: Alleghany Scrap, Inc.:


Sunday, January 28, 2024

Bulk Storage for Aidan Castings


I've finally gotten down to working on the scenery around the industries in Bryan Ferry.  But since it takes me forever to actually finish anything, I thought I'd show you first the major sub-project in that endeavor by itself, which is the bulk storage bins for the Aidan foundry.  

👉There's some interesting discussion around it, too - stay tuned!👈


The foundry receives coke, limestone, and pig iron in gondolas, and sand in covered hoppers.  As a small-town furnace, their operations are a bit casual - bulk materials are unloaded with an ancient conveyor, and stored on the ground, and charged into the furnace used a bucket loader.  Scrap is also a major inbound commodity, but being chunky and irregular, it can just be piled in a heap off to the side - no bin required.  

So I've been staring at that odd-shaped blank space for years, knowing what I wanted to build - a set of bins radiating out from a movable conveyor - but stewing over how to terminate it at the layout edge.  Any facility not extending beyond the layout would be ridiculously undersized, even by SNR standards - so an accommodation had to be made. 


Now, I've sliced through foreground buildings before, and I've treated the raw slice in two different ways:


1). At the J.D. Bumhauer Co. in St. Amour, I left the building open at the section, 
since the primary point was to provide a "railfan-through" scene, 
where one can watch rail traffic roll by through the numerous 
steel-sash windows, as I once did at a client in Hartford, Ct..  


2). Whereas, for the sand bin on the Yaeger service tracks, 
I built some mock-fascia to cover the exposure, 
since in real life one wouldn't want to see the inside 
of a giant pile of sand.  Or so I thought at the time.


At the foundry though, I had these odd-shaped walls in irregular alignment, with some interesting material heaps in the foundryman's four favorite flavors.  It seemed a shame to cover it all up with fascia - especially given that the wall slices go all the way to the top.  

So I opted to reverse the sand bin ruling, and leave these bins exposed at the section - as if the material were piled up against a pet's terrarium glass, to be viewed from the outside - along with the pet - by a superior species.  Well - at least a species that thinks it's superior to the pet.


The walls are foam-core, with the edges capped with putty.  All five of them actually follow the same pattern, just being abbreviated in different places based on where they strike the layout edge.

As always with concrete, I painted them with a latex mix, using horizontal brushstrokes which help suggest the casual, small-batch pours that were used in the day.  Initial weathering with washes of India ink highlighted the unevenness.  The sectioned foam-core centers make pretty decent concrete cuts, I think - maybe I should add some rebar!  


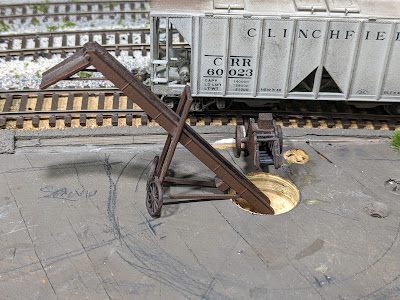
I did a quick mod on the Walthers conveyor to align the wheels circumferentially, allowing the conveyor to swing and serve any of the four commodities.  Haven't thought through what the pit is going to look like yet - would they just leave a mix of spillage at the bottom, or clean it out after each unload?  


I shaped the heaps first with foam and a hotwire, then covered them over.  The limestone is ballast, but the sand and coke were done with bona-fide sand and coke.  (For the record, all the coke and coal on the layout comes from nuggets of each I picked up as a kid, along the B&O in Tri-County.  How's that for authentic.)   Those three materials could be added after gluing the foam shapes into the bins.

For pig iron, though - in gondolas I use Chooch sugar-beet loads, which have textures that are surprisingly close in shape to the little piggies.  When painted and weathered with oxides, they're pretty convincing.  No such material exists in aggregate however.  So I approximated it with aquarium gravel, except that had to be painted after heaping and gluing, but before installing.  That was fun.  


And there it is - inbound materials at long last.  Next up, as Paul Harvey would say:  "the rest of the story."   

Eventually.


 👉  Faced with the same dilemma, 
would you cover the section with fascia, 
or show off the interesting stuff 

👉  Is it silly to see the sheer faces of aggregate heaps 


Thanks for reading, and let me know what you think!